Gaggia Classic Pro Manual: A Comprehensive Guide
This manual details the Gaggia Classic Pro, offering setup, brewing, cleaning, and troubleshooting guidance. PDF versions and diagrams are readily available online for support.
The Gaggia Classic Pro is a celebrated semi-automatic espresso machine, renowned for its robust build quality and ability to produce café-quality espresso at home. This machine represents a sweet spot for espresso enthusiasts, bridging the gap between entry-level and professional equipment. Owning a Gaggia means enjoying delightful espresso and cappuccino within the comfort of your home.
This guide serves as a comprehensive resource, designed to help you unlock the full potential of your Classic Pro. Whether you’re a seasoned barista or a beginner, understanding its components and operation is key. Resources like the service manual (Rev.04, 25/09/2023) and online support (servicegaggia.pro) are available to assist you. Prepare to embark on a journey of espresso perfection!
Understanding the Machine’s Components
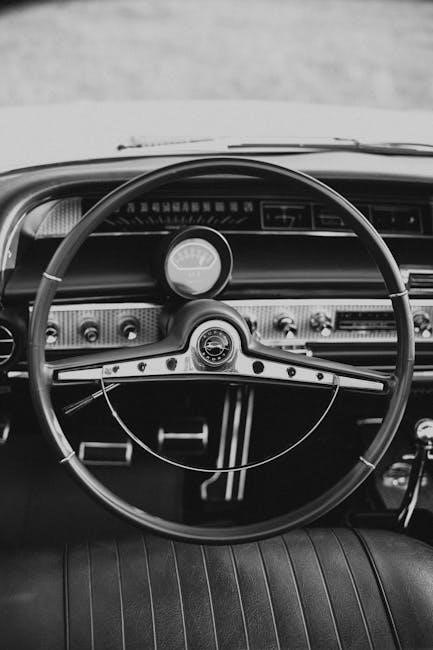
The Gaggia Classic Pro comprises several key components working in harmony. These include the stainless steel boiler, responsible for heating water to the ideal brewing temperature, and the commercial-style 58mm portafilter, crucial for consistent extraction. The machine features a robust pump delivering the necessary pressure for espresso.
Essential parts also include the water reservoir, supplying water for brewing and steaming, and the group head, where the portafilter locks in for extraction. Understanding the function of each part – detailed in parts diagrams – is vital for maintenance and troubleshooting. The electrical diagram provides insight into the machine’s internal wiring. Familiarizing yourself with these elements, as outlined in the manual, ensures optimal performance and longevity.
First-Time Setup and Preparation
Before your first brew with the Gaggia Classic Pro, careful setup is essential. Begin by removing all packaging and inspecting the machine for any damage. Fill the water reservoir with fresh, filtered water, ensuring it’s properly seated. Connect the machine to a grounded electrical outlet.
A crucial initial step involves flushing the system to remove any manufacturing residue. This is detailed in the manual and ensures a clean first shot. Avoid using flavored or caramelized coffee beans initially, as they can leave residue. Refer to the quick setup guide for a streamlined process. Proper preparation, following the manual’s instructions, guarantees optimal performance and a delightful espresso experience from the start.
Water Reservoir and Filter
The Gaggia Classic Pro utilizes a removable water reservoir, designed for easy filling and cleaning. Always use fresh, filtered water to prevent scale buildup and ensure optimal espresso flavor. The reservoir capacity is sufficient for multiple brewing cycles, minimizing frequent refills.
A water filter is recommended, and often included, to further enhance water quality and protect the machine’s internal components. Regularly replace the filter according to the manual’s guidelines – typically every two months, depending on water hardness. Proper water quality is paramount for consistent performance and longevity of your Gaggia Classic Pro. Ignoring water quality can lead to scaling and affect the taste of your espresso.
Portafilter and Baskets
The Gaggia Classic Pro comes equipped with a professional-style portafilter, typically made of brass, ensuring excellent thermal stability during espresso extraction. It accepts both single and double-shot baskets, allowing for brewing flexibility. The machine usually includes a pressurized basket, ideal for beginners, and a non-pressurized basket for experienced users seeking greater control over extraction.
Understanding basket types is crucial. Pressurized baskets are more forgiving with grind size and tamping, while non-pressurized baskets require precise technique. Regularly inspect the baskets for wear and tear, and ensure they are clean after each use. Proper basket maintenance contributes significantly to consistent espresso quality with your Gaggia Classic Pro.

Initial Machine Flushing
Before your first espresso, thoroughly flush the Gaggia Classic Pro to remove any manufacturing residue. Fill the water reservoir with fresh, filtered water. Turn on the machine and allow it to fully heat up. Once heated, run approximately 2-3 full brew cycles without coffee in the portafilter. This process cleans the internal pathways and group head.
Observe the water flow during flushing. It may initially appear cloudy or contain small particles – this is normal; Continue flushing until the water runs clear and consistently. This initial flush is a vital step for ensuring the purest flavor in your first espresso shots and maintaining the longevity of your machine. Repeat this process if the machine has been stored for an extended period.
Brewing Espresso: A Step-by-Step Guide
Begin by ensuring your Gaggia Classic Pro is fully heated. Grind your coffee beans to a fine consistency, suitable for espresso. Dose the portafilter basket with the appropriate amount of coffee (typically 7-9 grams for a single shot, 14-18 grams for a double). Tamp the grounds firmly and evenly, applying around 30lbs of pressure.
Lock the portafilter securely into the group head. Immediately start the brewing process. Aim for an extraction time of 25-30 seconds, yielding approximately 30-60ml of espresso. Monitor the extraction – a slow drip indicates too fine a grind, while a rapid flow suggests too coarse. Adjust your grind accordingly for optimal results. Enjoy your freshly brewed espresso!
Grinding Coffee Beans for Optimal Results
Achieving the perfect espresso with your Gaggia Classic Pro hinges on the quality of your grind. Avoid pre-ground coffee; freshly ground beans are crucial. A burr grinder is highly recommended over a blade grinder for consistent particle size. Start with a fine grind setting, as espresso requires a significantly finer consistency than drip coffee.
Dialing in your grind is an iterative process. If the espresso extracts too quickly (under 25 seconds), the grind is too coarse. Conversely, a slow extraction (over 30 seconds) indicates a grind that’s too fine. Make small adjustments to the grinder and repeat the process until you achieve the desired extraction time and flavor profile. Do not use caramelized or flavored beans.
Tamping Techniques for Consistent Extraction
Consistent tamping is paramount for even espresso extraction with your Gaggia Classic Pro. After grinding, distribute the coffee grounds evenly within the portafilter basket. Apply approximately 30 pounds of pressure when tamping – focus on consistency rather than sheer force. A level tamp ensures water flows uniformly through the coffee puck.
Use a calibrated tamper to help achieve consistent pressure. Tamp straight down, avoiding any angled pressure which can create channeling. After tamping, gently polish the surface to remove any loose grounds. A properly tamped puck will resist slight pressure when tapped on the counter. Mastering this technique minimizes inconsistencies and maximizes flavor.
Extracting the Perfect Shot

Achieving the perfect shot with your Gaggia Classic Pro requires precision. Insert the portafilter firmly into the group head and immediately initiate the brew cycle. A typical double shot (around 18-21 grams of coffee) should extract in 25-30 seconds, yielding approximately 60ml of espresso.
Observe the extraction – it should resemble warm honey, starting dark and gradually lightening to blonde. Adjust your grind size if the extraction is too fast (blonde quickly) or too slow (dark and sputtering). Fine-tune your tamping and dose as well. Consistent practice and observation are key to dialing in your perfect shot. Remember, small adjustments make a big difference!
Milk Frothing and Steaming
The Gaggia Classic Pro excels at milk steaming. Before frothing, purge the steam wand to remove any condensed water. Submerge the wand tip just below the surface of the milk, creating a vortex. This incorporates air, building microfoam – essential for latte art and a velvety texture.
As the milk heats (aim for 140-150°F / 60-65°C), gradually lower the pitcher to keep the wand tip near the surface. Once heated, submerge the wand fully to create a whirlpool, breaking up any large bubbles. Remember to immediately purge and wipe the steam wand after each use to prevent milk buildup. Practice makes perfect – achieving consistent microfoam takes time!
Purging the Steam Wand
Purging the steam wand on your Gaggia Classic Pro is a crucial step, both before and after each use. Before steaming, purging removes condensation built up inside the wand, ensuring you’re working with pure steam for optimal milk texturing. Simply open the steam valve fully for a few seconds – you’ll see water sputter out.
After steaming, purging immediately prevents milk from being drawn back into the steam system, which can cause blockages and affect future performance. Again, open the steam valve fully. Follow this by wiping the wand clean with a damp cloth. Consistent purging and cleaning are vital for maintaining the longevity and hygiene of your machine’s steam capabilities.
Creating Latte Art Basics
Latte art begins with properly textured milk – aim for a velvety microfoam with minimal bubbles. After purging the steam wand, submerge the tip slightly below the milk surface and introduce air to create the foam. Then, lower the wand to create a whirlpool, integrating the foam throughout.
Once the milk is textured, gently swirl the pitcher to ensure consistency. Hold back the foam with a spoon while pouring the base of the espresso. As the cup fills, lower the pitcher and wiggle to create designs like hearts or rosettas. Practice is key! Mastering the pour and milk texture are fundamental to achieving beautiful latte art with your Gaggia Classic Pro.
Cleaning and Maintenance
Regular cleaning is crucial for your Gaggia Classic Pro’s longevity and espresso quality. Daily tasks include wiping the machine, cleaning the portafilter, and purging the steam wand after each use. Weekly, remove and wash the water reservoir and drip tray.
More in-depth maintenance, like backflushing, should be performed regularly – ideally weekly or bi-weekly – using a cleaning detergent designed for espresso machines. Descaling is essential every 1-3 months, depending on water hardness, to remove mineral buildup. The group head also requires periodic cleaning to ensure proper sealing and extraction. Refer to the full manual for detailed instructions and recommended cleaning products.
Backflushing Procedure
Backflushing cleans the group head, removing coffee oils and residue. Use a blind filter and espresso machine cleaning detergent. Insert the blind filter into the portafilter, add one scoop of detergent, and lock it into the group head. Initiate a brew cycle for 10-15 seconds, then stop it.
Repeat this process 5-10 times, allowing the machine to fill and release pressure each time. Remove the portafilter, rinse thoroughly, and repeat the backflushing process with clean water only, several times, until no detergent remains. This ensures a clean and optimally functioning group head, vital for consistent espresso extraction; Consult your manual for specific detergent recommendations and safety precautions.
Descaling the Machine

Descaling removes mineral buildup from your Gaggia Classic Pro, crucial for maintaining performance and longevity; Use a descaling solution specifically designed for espresso machines, following the product’s instructions carefully. Typically, you’ll dilute the descaler with water and pour it into the water reservoir.

Run the machine through a full brew cycle, then repeat with fresh water several times to thoroughly rinse the system. Avoid using vinegar, as it can damage internal components. Regular descaling – every 2-3 months, depending on water hardness – prevents scale buildup, ensuring optimal water flow and consistent brewing temperatures. Refer to your manual for detailed descaling procedures and recommended solutions.
Cleaning the Group Head
Cleaning the group head on your Gaggia Classic Pro is vital for preventing stale coffee oils from affecting espresso flavor. After each use, wipe the group head with a damp cloth to remove loose grounds. Regularly, perform a backflush (see dedicated section) to dislodge built-up residue.
Periodically, remove the shower screen and gasket for a thorough cleaning. Soak them in warm water with a dedicated espresso machine cleaning detergent. Inspect the gasket for wear and replace if necessary. A clean group head ensures proper water distribution and a consistently delicious espresso. Neglecting this area can lead to bitter flavors and reduced crema quality. Always refer to your manual for specific cleaning recommendations.
Troubleshooting Common Issues
Troubleshooting your Gaggia Classic Pro often involves simple solutions. If the machine isn’t heating, check the power supply and ensure the thermostat is functioning correctly. Low water pressure can stem from scale buildup – descaling is crucial! Leaks frequently indicate a loose connection or worn gasket; inspect these areas carefully.
Consistent issues may require deeper investigation. Refer to the manual for specific error codes or symptoms. Online forums and the official Gaggia support website offer valuable resources. Remember to unplug the machine before any internal inspection. Don’t attempt repairs beyond your skill level; professional servicing is recommended for complex problems. Regular maintenance minimizes the likelihood of encountering these common issues.
Machine Not Heating Up
If your Gaggia Classic Pro fails to heat, begin with basic checks. Confirm the machine is securely plugged into a functioning power outlet. Inspect the power cord for any visible damage. Next, verify the main switch is firmly in the ‘on’ position. A blown fuse could also be the culprit; consult the manual for fuse location and replacement instructions.
If these steps don’t resolve the issue, the thermostat might be malfunctioning. This requires professional diagnosis and repair. Avoid attempting to bypass or repair the thermostat yourself due to electrical hazards. Refer to the Gaggia service manual or contact Gaggia support for assistance. Ensure proper voltage is supplied to the machine, as incorrect voltage can prevent heating.
Low Water Pressure
Experiencing low water pressure with your Gaggia Classic Pro often indicates a blockage or scale buildup. First, check the water reservoir to ensure it’s adequately filled and properly seated. Inspect the water filter; a clogged filter restricts water flow. Descale the machine regularly, as mineral deposits significantly reduce pressure – follow the descaling procedure outlined in the manual.
Additionally, examine the group head and solenoid valve for obstructions. Backflushing (detailed in the cleaning section) can help clear buildup. If the issue persists, the pump may be failing and require professional attention. Refer to the Gaggia service manual for pump diagnostics or contact Gaggia support for qualified repair services.
Leaking Water
Water leaks from your Gaggia Classic Pro can stem from several sources. Check the water reservoir for cracks or improper seating – ensure a tight seal. Inspect the connections between the reservoir and the machine, as well as the hoses leading to the pump and group head. Tighten any loose fittings carefully, avoiding excessive force.
A common leak point is the solenoid valve; examine it for drips. The group head gasket may also be worn or damaged, causing leaks during brewing. Replace the gasket if necessary. If leaks continue, consult the manual’s parts diagram to identify potential problem areas. For persistent leaks, professional servicing is recommended, referencing the Gaggia service manual for detailed repair instructions.

Gaggia Classic Pro Technical Specifications
The Gaggia Classic Pro boasts a robust stainless steel body and a commercial-style 58mm portafilter. It operates on 1450W power at 120V/60Hz, featuring a 230V/50Hz alternative. The pump pressure reaches 9 bars, crucial for optimal espresso extraction. Water tank capacity is approximately 2.1 liters (71 oz), while the boiler capacity is 0.72 liters (24 oz).
Dimensions are roughly 24cm (W) x 30;5cm (D) x 38cm (H). The machine utilizes a thermoblock heating system for rapid heat-up. It includes a three-way solenoid valve for dry puck ejection. Refer to the official Gaggia website or service manual for the most current and detailed specifications, including electrical diagram details and component information;
Electrical Diagram Overview
The Gaggia Classic Pro’s electrical system centers around the thermoblock heater, controlled by thermostats and a thermal fuse for safety. The pump receives power via a relay, activated by the machine’s control board. Wiring connects the power cord to the switch, then to the control board, distributing power to the pump, heater, and solenoid valve.
Understanding the diagram requires identifying key components: the power transformer, heating element, and various sensors. A detailed service manual provides a comprehensive schematic, illustrating wire colors and connections. PDF versions are available online. Always disconnect power before attempting any electrical work, and consult a qualified technician if unsure about interpreting the diagram or performing repairs. Incorrect wiring can cause damage or pose a safety hazard.
Parts Diagram and Identification
The Gaggia Classic Pro consists of numerous components, each crucial for optimal function. Key parts include the portafilter, baskets, group head, thermoblock heater, pump, water reservoir, and control board. Detailed exploded view diagrams, often found in the service manual, visually identify each part with corresponding reference numbers.
These diagrams are invaluable for repairs and maintenance, allowing precise identification of replacement parts. Online resources and PDF downloads offer access to these schematics. Common parts requiring occasional replacement include seals, gaskets, the solenoid valve, and the pump. Knowing the part numbers simplifies ordering and ensures compatibility. Always refer to the official Gaggia documentation for accurate identification and proper installation procedures.
Resources and Support

For comprehensive assistance with your Gaggia Classic Pro, several resources are available. The Official Gaggia Website provides access to frequently asked questions, troubleshooting guides, and downloadable manuals, including the service manual in PDF format. Dedicated online forums and communities offer peer-to-peer support, sharing experiences and solutions.
Directly contacting Gaggia Support via their website or email (servicegaggia.pro) provides expert assistance for more complex issues. Many independent repair shops specialize in espresso machine service, offering professional diagnostics and repairs. Remember to have your machine’s serial number readily available when seeking support. Utilizing these resources ensures you can maintain your Gaggia Classic Pro and enjoy consistently excellent espresso for years to come.
Official Gaggia Website
The Official Gaggia Website serves as a primary hub for Gaggia Classic Pro owners. Here, you can download the complete user manual in PDF format, alongside detailed service manuals (like the Gaggia Classic 2019 and Classic Evo Pro Rev.04 dated 25/09/2023). Access to parts diagrams, electrical schematics, and performance test information is also provided.
The website features a dedicated support section with FAQs addressing common issues. You’ll find information on machine care, maintenance procedures like backflushing and descaling, and troubleshooting guides. Registration of your machine may unlock additional benefits and support options. Regularly checking the official site ensures you have the latest updates and resources for your Gaggia Classic Pro.
Service Manual Download
Accessing the Service Manual for your Gaggia Classic Pro is crucial for in-depth troubleshooting and repair. Several online resources host these manuals, including versions specifically for the Gaggia Classic 2019 and Classic Evo Pro (Rev.04, dated 25/09/2023). These documents provide detailed parts diagrams, electrical diagram overviews, and comprehensive performance testing procedures.
Downloading the manual allows you to understand the machine’s internal workings, aiding in diagnosing complex issues beyond basic user maintenance. It’s invaluable for identifying components, understanding wiring, and performing more advanced repairs. Be aware that these manuals are technical and intended for those with some mechanical aptitude; always prioritize safety when working on electrical appliances.
Contacting Gaggia Support
When facing issues not addressed by the manual or online resources, directly contacting Gaggia support is recommended. While specific contact details can vary, searching the official Gaggia website is the best starting point for current information. Look for dedicated support sections, FAQs, and contact forms.
Some sources indicate an email address – servicegaggia.pro – may be available for technical inquiries. However, verifying this through the official website is essential. Be prepared to provide your machine’s model number (RI9380 Classic Pro) and serial number when contacting support to expedite the assistance process. Clearly describe the problem, including any error messages or observed behaviors, for efficient troubleshooting.