Keurig 2․0 Manual: A Comprehensive Guide
This guide offers troubleshooting tips, care instructions, and how-to videos for your Keurig 2․0 brewer, ensuring optimal performance and resolving common issues․
Welcome to the world of convenient, single-cup brewing with your Keurig 2․0! This brewer represents a significant step forward in home coffee technology, offering a versatile and user-friendly experience․ This manual is designed to guide you through every aspect of your Keurig 2․0, from initial setup to daily use and maintenance․
The Keurig 2․0 series boasts enhanced features and brewing capabilities compared to previous models․ Understanding these features is key to maximizing your brewing enjoyment․ Whether you’re a coffee aficionado or simply seeking a quick and easy caffeine fix, the Keurig 2․0 adapts to your preferences․
This guide will address common questions and troubleshooting scenarios, ensuring you can quickly resolve any issues that may arise; We’ll cover everything from water pressure problems to error messages, providing clear instructions for optimal performance․ Let’s begin your journey to perfectly brewed coffee!
Understanding Keurig 2․0 Models
The Keurig 2․0 family encompasses several models, each designed with specific features to cater to diverse needs․ Key distinctions lie in brewing capacity, programmability, and aesthetic design․ The Keurig 2․0 Plus Series, for example, offers enhanced control over brew strength and cup size, while standard 2․0 models provide reliable, straightforward brewing․
A crucial aspect of the 2․0 series is its compatibility with K-Cup pods․ Newer models require the use of specifically designed 2;0 K-Cup pods, which feature an updated read code for optimal brewing․ Understanding this requirement is vital to avoid issues with pod recognition and brewing performance․
This manual provides general guidance applicable to most Keurig 2․0 models, but always refer to the specific documentation included with your brewer for detailed instructions and model-specific features․ Proper model identification ensures you’re utilizing the correct settings and maximizing your brewing experience․
Setting Up Your Keurig 2․0
Initial setup is straightforward․ Begin by removing all packaging materials and placing your Keurig 2․0 on a stable, level surface․ The water reservoir is a key component; remove it, fill with fresh, filtered water to the desired level, and securely reattach it to the brewer․ Ensure it’s properly seated to prevent leaks during operation․
Before the first brew, it’s recommended to run a few brewing cycles with just water – no K-Cup pod – to cleanse the internal system․ This helps remove any residual manufacturing debris and ensures a fresh-tasting first cup․ This initial flush prepares the machine for optimal performance․
Refer to the included instructions for specific details regarding your model․ Proper setup is crucial for avoiding potential issues and maximizing the lifespan of your Keurig 2․0 brewer․
Initial Setup and Water Reservoir
To begin, unpack your Keurig 2․0 and remove all packing materials․ Locate the water reservoir; lift it off the brewer’s base․ Rinse the reservoir with cool, fresh water before filling․ Only use filtered water to prevent mineral buildup, which can affect brewing performance and necessitate more frequent descaling․
Fill the reservoir to the maximum fill line, ensuring not to overfill․ Carefully place the reservoir back onto the brewer, confirming it’s securely seated․ A proper seal is vital to avoid water leakage during the brewing process․ The reservoir’s capacity determines how many cups you can brew before refilling․
For optimal results, always use fresh water and regularly clean the reservoir as per the instructions in the Keurig care guide․ This simple step contributes significantly to the longevity and efficiency of your brewer․
Powering On and First Brew
Once the water reservoir is filled and securely in place, plug your Keurig 2․0 into a grounded electrical outlet․ Press the power button to turn on the brewer; it will begin to heat the water․ Allow a few minutes for the water to reach the optimal brewing temperature – the indicator light will signal when it’s ready․
Before brewing your first cup, it’s recommended to run a few brewing cycles with just water, without a K-Cup pod․ This helps to flush out any residual manufacturing residue and ensures a clean, fresh taste․ Simply place a mug on the drip tray and select your desired cup size․
Initiate the brew cycle and discard the hot water․ Repeat this process 2-3 times․ Your Keurig 2․0 is now primed and ready to brew delicious coffee!

Brewing with Your Keurig 2․0
Enjoy a variety of beverages using compatible K-Cup pods, selecting from multiple cup sizes and utilizing the “Strong” brew option for a bolder flavor․
Compatible K-Cup Pods
The Keurig 2․0 brewers, particularly the Plus Series, were designed with compatibility in mind, though some users initially faced concerns regarding pod restrictions․ While most standard K-Cup pods will function, the 2․0 models introduced technology to recognize pod types․ This ensures optimal brewing parameters are utilized for each specific pod․
Generally, Keurig 2․0 brewers are compatible with a wide range of K-Cup pods available on the market․ However, it’s crucial to note that older, non-licensed K-Cup pods might not be fully recognized, potentially leading to suboptimal brewing․ Licensed K-Cup pods, indicated by a specific marking, are guaranteed to work seamlessly with your Keurig 2․0 machine, delivering the best possible brewing experience․ Always check the packaging to confirm compatibility before use․
Brewing Different Cup Sizes
Your Keurig 2․0 brewer offers a versatile range of cup size options to cater to your preferences․ The available sizes typically include 6, 8, 10, and 12 ounces, allowing you to brew everything from a small espresso-style cup to a larger mug of coffee․ Selecting your desired cup size is straightforward – simply use the control buttons on your Keurig 2․0 to cycle through the available options before initiating the brewing process․
The machine automatically adjusts the water volume based on your selection, ensuring a consistently brewed cup․ Remember that using a smaller cup size with a larger K-Cup pod might result in a stronger brew, while a larger cup size with a smaller pod could yield a weaker one․ Experiment to find the perfect combination for your taste!
Using the “Strong” Brew Option
For those who prefer a bolder, more robust coffee flavor, the Keurig 2․0 brewer features a convenient “Strong” brew option․ This function doesn’t alter the cup size but modifies the brewing process to extract more flavor from your K-Cup pod․ Activating the “Strong” brew is typically done by pressing a dedicated button before initiating the brew cycle – consult your specific model’s control panel for exact location․
When “Strong” brew is selected, the Keurig 2․0 slows down the water flow, allowing for increased contact time between the water and the coffee grounds within the K-Cup․ This extended contact results in a richer, more intense flavor profile․ It’s particularly effective with lighter roast coffees or when you simply desire a more powerful cup to kickstart your day!
Maintenance and Cleaning
Regular descaling, cleaning entrance and exit needles, and water filter replacement are crucial for maintaining optimal Keurig 2․0 performance and longevity․
Descaling Your Keurig 2․0
Descaling is a vital maintenance step for your Keurig 2․0, removing mineral buildup that can affect brewing performance and taste․ To begin, ensure your Keurig is turned off and unplugged for safety․ Remove any water filter present and place a large cup on the drip tray․ Then, plug the machine back in․

Initiate the descaling mode – the specific process may vary slightly depending on your model, so consult your brewer’s specific instructions․ Typically, this involves pressing and holding a combination of buttons․ Once descaling mode is active, the Keurig will prompt you to add the descaling solution (often a mixture of white vinegar and water, or a commercially available descaling solution)․ Follow the on-screen prompts carefully, completing the descaling cycle as directed․
After the cycle finishes, thoroughly rinse the reservoir with fresh water and run several brewing cycles with only water to eliminate any residual descaling solution․ This ensures your next cup of coffee tastes clean and fresh!
Cleaning Entrance and Exit Needles
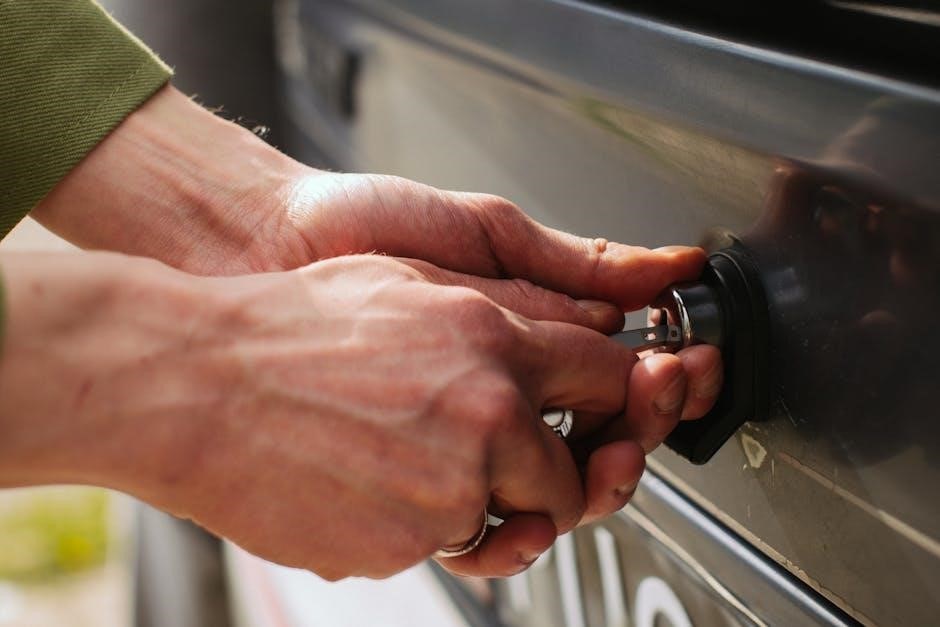
Clogged needles are a frequent cause of brewing problems in your Keurig 2․0․ The entrance needle punctures the top of the K-Cup, while the exit needle allows brewed coffee to flow․ Regularly cleaning these ensures optimal performance․ To access the exit needle, lift the pod holder lever, revealing the needle underneath․
Carefully inspect both needles for coffee grounds or mineral deposits․ A straightened paper clip or a dedicated Keurig cleaning tool can be used to gently dislodge any debris․ Be extremely cautious to avoid bending or damaging the needles․
For the entrance needle, lift the pod holder completely․ Gently insert the cleaning tool or paperclip and move it around to clear any obstructions․ Always ensure the machine is off and unplugged during cleaning․ Regular needle cleaning prevents slow brewing and ensures a full-flavored cup․
Identifying Clogged Needles
Recognizing a clogged needle is the first step to resolving brewing issues with your Keurig 2․0․ Common signs include slow brewing times – if your Keurig takes significantly longer to brew a cup than usual, a blockage is likely․ Another indicator is a weak or inconsistent brew; clogged needles restrict water flow, resulting in a less flavorful coffee․
Visually inspect the entrance and exit needles․ Look for visible coffee grounds or mineral buildup․ If water isn’t flowing freely through the needles when the machine is briefly run without a K-Cup, this confirms a clog․ Reduced water volume in your cup is also a telltale sign․
Don’t ignore these symptoms! Addressing clogged needles promptly prevents further damage and ensures your Keurig continues to deliver a perfect cup every time․ Regular inspection is key to preventative maintenance․
Using a Cleaning Tool
Once you’ve identified a clogged needle, a cleaning tool is essential for safe and effective removal of debris․ Keurig provides specialized cleaning tools, but a simple paper clip (unfolded) can also work carefully․ Always ensure the Keurig is off and unplugged before attempting any cleaning․
Gently insert the cleaning tool into the entrance needle (where the water enters) and the exit needle (where it pierces the K-Cup)․ Move it slowly and carefully to dislodge any coffee grounds or mineral buildup․ Avoid excessive force, which could damage the needles․
Repeat this process several times, rotating the tool to reach all areas of the needle․ After cleaning, run a few brewing cycles with just water to flush out any remaining particles․ Regular use of a cleaning tool maintains optimal brewing performance․
Water Filter Replacement
Maintaining a fresh water filter is crucial for the quality of your brewed coffee and the longevity of your Keurig 2․0․ Keurig recommends replacing the water filter every two months, or after approximately 60 tanks of water․ Using a filter significantly reduces chlorine, calcium, and other impurities that can affect taste․
To replace the filter, first locate the filter holder within the water reservoir․ Gently pull up on the filter holder to remove it․ Discard the old filter and rinse the holder thoroughly․ Insert a new Keurig water filter into the holder, ensuring it’s securely seated․
Reinstall the filter holder into the reservoir․ After installing a new filter, run a full brewing cycle without a K-Cup to flush the system and activate the filter․ Consistent filter replacement ensures consistently delicious coffee․
Troubleshooting Common Issues
Don’t panic if your Keurig gives you trouble! This section provides solutions for problems like water pumping failures, pressure issues, and error messages․
Keurig 2․0 Not Pumping Water
If your Keurig 2․0 is failing to pump water during brewing, several factors could be at play․ A common culprit is a clogged needle, specifically the entrance or exit needle responsible for piercing the K-Cup․ Carefully inspect and clear any debris using a paper clip or a dedicated needle cleaning tool – ensure the machine is off and unplugged first!
Another potential issue is the need for descaling․ Mineral buildup can restrict water flow․ Run a descaling cycle following the instructions in the maintenance section of this manual․ Also, verify the water reservoir is properly seated and filled with sufficient water․
Finally, confirm the K-Cup is correctly inserted and that the pod holder is securely closed․ A loose fit can prevent proper water pressure․ If problems persist, consult the Keurig support website for further assistance and detailed troubleshooting steps․
Addressing Water Pressure Problems
Low water pressure in your Keurig 2․0 often stems from mineral buildup restricting water flow within the internal components․ Regularly descaling your brewer is crucial to prevent this․ Run the descaling mode, ensuring you follow the provided instructions carefully – unplug the machine before starting and use a cup in place of the filter․
Clogged needles are another frequent cause․ Both the entrance and exit needles should be inspected and cleaned using a paper clip or a specialized cleaning tool․ Remember to power off and unplug the Keurig before attempting any cleaning․
Ensure the water reservoir is correctly positioned and adequately filled․ A poorly seated reservoir can disrupt the water intake․ If issues continue, check for kinks or blockages in any connecting tubing, though this is less common․
Dealing with Error Messages
When your Keurig 2․0 displays an error message, it’s the brewer’s way of signaling a problem requiring attention․ Common errors often relate to water supply, pod recognition, or internal malfunctions․ First, try a simple power cycle – turn the Keurig off, unplug it for a minute, and then plug it back in․
If the error persists, consult the Keurig website or your brewer’s specific manual for a detailed explanation of the code․ Many errors can be resolved by descaling the machine or cleaning the entrance and exit needles, removing any obstructions․
For more complex errors, contacting Keurig customer support is recommended․ They can provide tailored guidance and potentially diagnose hardware issues requiring professional repair or replacement․