
Hampton Bay Ceiling Fan Manual: Remote Control – A Comprehensive Guide
This guide details Hampton Bay remote controls, covering setup, troubleshooting, smart features, and replacements, ensuring optimal fan operation and user experience․
Understanding Hampton Bay Remote Control Systems
Hampton Bay ceiling fans often utilize infrared (IR) remote control systems, requiring a direct line of sight between the remote and the fan’s receiver․ Newer models increasingly integrate Wi-Fi capabilities, enabling control via smartphone apps and voice assistants like Alexa and Google Assistant․
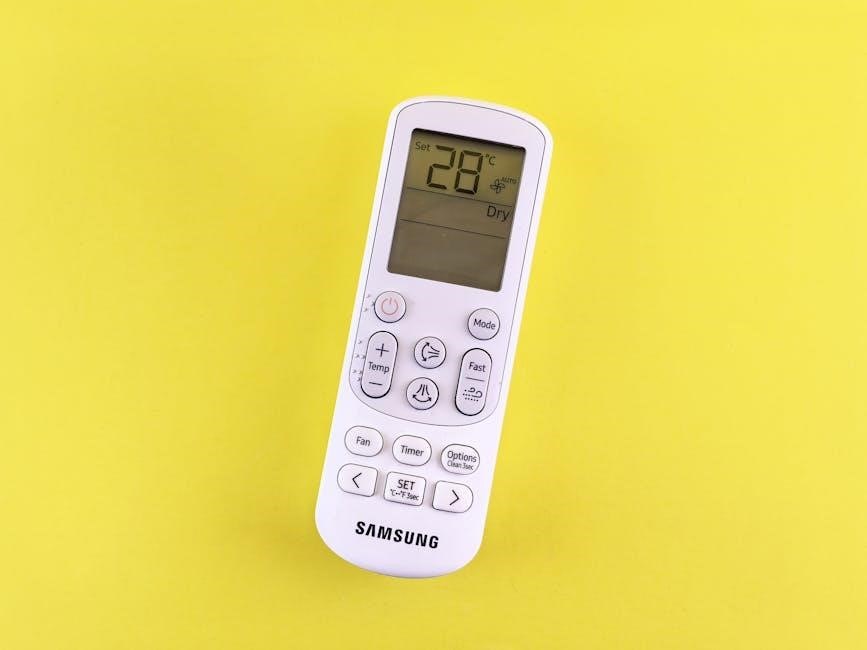
These systems typically manage fan speed, light dimming, and timer functions․ Compatibility varies significantly between models; therefore, identifying your specific remote type is crucial for proper operation and troubleshooting․ Some remotes feature LCD displays for enhanced control and feedback․

Remote Control Compatibility: Identifying Your Model
Determining your Hampton Bay fan and remote model is essential for compatibility․ Locate the fan’s model number, usually on a sticker near the motor housing or on the original packaging․ The remote often has a corresponding model number inside the battery compartment or on the back․
Hampton Bay offers various remote kits, including LCD thermostatic models and smart fan remotes․ Ensure the replacement remote is specifically designed for your fan model to guarantee all functions operate correctly․ Universal remotes may offer limited compatibility․
Initial Setup and Pairing the Remote
Before using your Hampton Bay remote, install the batteries correctly, observing polarity․ Initial pairing establishes communication between the remote and the fan receiver․ This process often involves turning the fan’s power off and on while pressing a specific button sequence on the remote․
Refer to your fan’s manual for the exact pairing procedure, as it varies by model․ Successful pairing is indicated by the fan responding to remote commands, such as turning on or adjusting speed․
Pairing a New Remote to Your Fan
To pair a new Hampton Bay remote, begin by ensuring the fan has power․ Typically, this involves cycling the power switch off and on several times – often three times – within a short timeframe․ Immediately after the final power-on, press and hold the ‘pair’ or ‘learn’ button on the remote․
The fan may briefly flash its lights to confirm pairing mode․ Continue holding the button until the fan responds to a command, indicating successful synchronization․ Consult your specific model’s manual for precise instructions․
Resetting a Paired Remote
If your Hampton Bay remote becomes unresponsive or incorrectly paired, resetting it can restore functionality․ Begin by removing the batteries from the remote control․ Then, cycle the power to the ceiling fan off and on at the wall switch three times, waiting a few seconds between each cycle․
Reinsert the batteries into the remote and attempt to re-pair it following the initial pairing instructions․ This process clears the previous pairing and allows for a fresh connection with the fan․
Troubleshooting Common Remote Issues
Encountering problems with your Hampton Bay remote is common․ Initial troubleshooting involves verifying battery functionality – ensure they are fresh and correctly installed․ Signal interference from other devices can limit range; try relocating the fan or reducing obstructions․
If buttons aren’t working as expected, a reset might be needed․ Consider potential compatibility issues if using a universal remote․ Persistent issues may indicate a faulty remote requiring replacement․
Remote Not Responding: Battery Checks
A non-responsive remote often stems from depleted or incorrectly installed batteries․ Begin by replacing the batteries with fresh ones, ensuring correct polarity (+/-) alignment․ Confirm the battery compartment is securely closed․ Test with a known-good battery to rule out battery quality issues․
Low battery signal strength can also cause intermittent responsiveness․ If problems persist after battery replacement, proceed to investigate potential signal interference․

Signal Interference and Range Limitations
Hampton Bay remotes utilize radio frequency (RF) signals, susceptible to interference from other devices․ Common culprits include other RF transmitters, certain LED lighting, and even physical obstructions like thick walls or metal objects․
Ensure a clear line of sight between the remote and the fan receiver․ The typical operational range is around 30 feet, but this can be reduced by interference․ Try moving closer to the fan to test signal strength․
Incorrect Functionality: Button Mapping Problems
If buttons on your Hampton Bay remote aren’t performing their designated functions, a re-pairing or reprogramming might be necessary․ Sometimes, the remote’s internal programming can become corrupted, leading to mismatched button assignments․
Consult your fan’s manual for specific reprogramming instructions, often involving DIP switch configurations․ A reset of both the remote and the receiver unit can also resolve these issues, restoring the correct button-to-function mapping․
Hampton Bay Remote Control Features Explained
Hampton Bay remotes offer diverse control options, including precise speed adjustments for optimal airflow and convenient dimming capabilities for integrated lighting․ Many models feature dedicated light control, allowing brightness and, in some cases, color temperature adjustments․
Advanced remotes boast timer and scheduling functions, enabling automated fan operation․ Newer smart remotes integrate Wi-Fi for app control and voice assistant compatibility, enhancing convenience and personalization․
Speed Control and Dimming Functions
Hampton Bay remotes provide granular speed control, typically with multiple settings – low, medium, and high – for customized airflow․ Some advanced models offer a ‘breeze’ function, simulating natural wind patterns․ Dimming functions allow precise light intensity adjustment, creating the desired ambiance․
These features are often integrated, enabling simultaneous speed and light adjustments․ LCD displays on certain remotes visually indicate the selected speed and dimming level, offering clear feedback to the user․
Light Control Options (Brightness & Color Temperature)
Hampton Bay remotes offer extensive light control, beyond simple on/off functionality․ Brightness adjustment allows users to tailor illumination levels to suit their needs, from a subtle glow to full brightness․ More sophisticated models incorporate color temperature control, enabling a shift between warm and cool white light․
This feature enhances ambiance and functionality, supporting both relaxation and task lighting․ Some remotes feature preset lighting scenes for convenience, while compatibility with LED bulbs is standard․
Timer and Scheduling Features
Many Hampton Bay remotes include built-in timer and scheduling capabilities, enhancing convenience and energy efficiency․ Users can set the fan and light to automatically turn off after a specified duration, ideal for bedtime use․ More advanced models allow for customized schedules,
enabling automated operation based on time of day or specific days of the week․ This feature minimizes energy waste and provides a comfortable environment without manual intervention․ App integration often expands scheduling options․

Smart Fan Control & App Integration
Modern Hampton Bay ceiling fans increasingly offer smart control features, integrating with home automation systems․ Wi-Fi connectivity allows control via a dedicated mobile app, providing remote access to fan speed, lighting, and scheduling․ Compatibility with voice assistants like Amazon Alexa and Google Assistant
enables hands-free operation․ The app often provides advanced settings and monitoring capabilities, enhancing user convenience and control over their ceiling fan’s performance․
Wi-Fi Connectivity and Setup
Establishing Wi-Fi connectivity typically involves downloading the Hampton Bay smart fan app and following the in-app instructions․ The fan must be within range of your home’s 2․4 GHz Wi-Fi network․ The setup process usually requires entering your Wi-Fi password within the app
and may involve pressing a pairing button on the fan or remote․ Successful connection grants remote control and access to smart features through the app․
Voice Control Compatibility (Alexa, Google Assistant)
Hampton Bay smart fans often integrate with voice assistants like Amazon Alexa and Google Assistant․ After linking the Hampton Bay app to your voice assistant account, you can control the fan using voice commands․
Commands typically include turning the fan on/off, adjusting speed, and controlling the light․ Ensure the fan is properly named within the app for seamless voice recognition and operation․
Replacing a Lost or Damaged Remote
If your Hampton Bay remote is lost or damaged, several options exist for replacement․ Online retailers frequently stock genuine Hampton Bay remotes, searchable by model number․
Alternatively, universal remote controls can be programmed to function with Hampton Bay fans, offering a cost-effective solution․ Ensure the universal remote supports the fan’s frequency and functions before purchasing․
Finding Replacement Remotes Online
Numerous online marketplaces offer replacement Hampton Bay ceiling fan remotes․ Websites like eBay and Amazon are excellent starting points, often listing both new and used options․
When searching, specify your fan’s model number to ensure compatibility․ Look for remotes described as “Hampton Bay LCD Thermostatic Remote Control Kit” or similar․
Always verify seller ratings and return policies before purchasing to guarantee a satisfactory transaction and a functional replacement remote for your ceiling fan․
Universal Remote Control Options
If a direct replacement Hampton Bay remote is unavailable, consider a universal ceiling fan remote control․ These remotes are designed to work with multiple brands and models, offering a versatile solution․
Look for universal remotes specifically marketed for ceiling fans, ensuring compatibility with your fan’s receiver․
Programming may be required, often involving a learning function to mimic the original remote’s signals․ Carefully follow the universal remote’s instructions for successful setup․
Hampton Bay Remote Control Programming
Programming your Hampton Bay remote ensures customized control of your ceiling fan․ Some models utilize DIP switches, small switches on the receiver and remote, requiring matching configurations for proper function․
Refer to your fan’s manual for the specific DIP switch settings․
Other remotes employ a learning function, where the remote learns commands from the original remote․
Carefully follow the programming steps outlined in your manual to avoid functionality issues․
Programming Specific Functions
Beyond basic pairing, customizing specific functions enhances your Hampton Bay fan experience․ This often involves assigning buttons for preferred speeds, dimming levels, or timer settings․
Consult your remote’s manual for detailed instructions on function programming․
Some remotes allow you to create personalized profiles, saving your preferred settings for quick access․
Ensure each function is correctly mapped to avoid unexpected behavior and maximize control over your fan’s features․
Understanding the DIP Switch Settings
DIP switches, found within some Hampton Bay remote receivers, establish communication between the remote and the fan․ These tiny switches configure a unique code, ensuring compatibility and preventing interference from neighboring fans․
Carefully examine your remote’s manual to understand the specific function of each DIP switch․
Incorrect settings can lead to non-responsiveness or erratic behavior․
When replacing a receiver or remote, matching the DIP switch configurations is crucial for proper operation․
Advanced Features and Customization
Hampton Bay remotes offer more than basic speed and light control․ Explore features like the reverse function, allowing for seasonal airflow adjustments – cooling in summer, distributing warm air in winter․
Some models support customized settings, enabling users to tailor fan operation to their preferences․
Experiment with different speed and light combinations to create the perfect ambiance․
Understanding these advanced options unlocks the full potential of your ceiling fan․
Reverse Function Control
The reverse function, typically controlled via a dedicated button on the remote, alters the blade rotation direction․ In summer, a downward airflow creates a cooling breeze․
During winter, reversing the direction pulls cool air up, circulating warm air downwards for efficient heating․
This feature maximizes comfort and energy savings throughout the year․
Consult your specific model’s manual for precise instructions on utilizing the reverse function effectively․
Seasonal Mode Adjustments
Hampton Bay remotes often facilitate easy seasonal adjustments for optimal comfort and energy efficiency․ Utilize the reverse function to change blade direction․
For summer, ensure a downward airflow for a cooling effect․ In winter, reverse the direction to gently circulate warm air trapped near the ceiling․
These adjustments minimize heating and cooling costs․
Refer to your fan’s manual for specific remote control settings related to seasonal operation and maximizing performance․
Battery Information and Maintenance
Maintaining optimal battery performance is crucial for reliable remote operation․ Hampton Bay remotes typically require alkaline batteries, often AAA or AA size․
Regularly check battery levels, especially if experiencing intermittent responsiveness․ Replace batteries promptly when performance diminishes to avoid signal loss․
Remove batteries during prolonged storage to prevent corrosion and leakage․
Consider using high-quality batteries for extended life and consistent performance, ensuring seamless control of your ceiling fan’s functions․
Recommended Battery Types
For Hampton Bay ceiling fan remotes, alkaline batteries are consistently recommended for their reliable power output and extended lifespan․ Specifically, AAA or AA alkaline batteries are most commonly required, depending on the remote model․
Avoid using rechargeable or carbon-zinc batteries, as they may not provide sufficient voltage or consistent performance, potentially leading to operational issues․
Premium alkaline brands often deliver superior longevity and reduced risk of leakage, ensuring dependable remote functionality․
Extending Battery Life
To maximize the lifespan of your Hampton Bay remote control batteries, minimize prolonged button presses and avoid unnecessary operation․ When not in use for extended periods, consider removing the batteries to prevent potential leakage and corrosion․
Ensure the remote is stored in a cool, dry environment, away from direct sunlight or extreme temperatures, which can degrade battery performance․
Regularly check for and remove any dust or debris that may accumulate within the battery compartment․
Hampton Bay Ceiling Fan Control Switches (Alternative to Remote)
For those preferring wall-based control, Hampton Bay offers alternative fan control switches․ Slide action switches provide intuitive speed adjustments, offering a traditional and reliable operation method․
Wall-mounted control options offer a more permanent solution, integrating seamlessly into your home’s décor․ These switches often include separate controls for fan speed and light functions․
Ensure compatibility with your fan model before installation, and always follow proper electrical safety procedures․
Slide Action Fan Control Switches
Hampton Bay’s slide action fan control switches offer a simple, direct alternative to remote operation․ These switches typically feature a sliding mechanism to adjust fan speeds – low, medium, and high – with a distinct ‘click’ for each setting․
Installation is generally straightforward, replacing your existing wall switch․ They are known for their durability and ease of use, providing a tactile and reliable control experience․
These switches are often a cost-effective solution for basic fan control needs․
Wall-Mounted Control Options
Beyond slide action switches, Hampton Bay offers more sophisticated wall-mounted fan controls․ These often include features like dimming capabilities for integrated lights, and potentially, speed control for multiple fans simultaneously․
Installation may require neutral wire connections, so checking your existing wiring is crucial․
These controls provide a permanent, convenient solution, eliminating the need for remotes and offering a cleaner aesthetic․
Consider these options for enhanced functionality and a streamlined look․
Safety Precautions When Using Remote Controls
Always disconnect power at the breaker before performing any maintenance on the fan or remote․ Avoid exposing the remote to moisture, which can cause electrical hazards and malfunction․
Keep batteries out of reach of children, and dispose of used batteries properly․
Never attempt to disassemble or repair the remote control yourself; contact qualified personnel for assistance․
Store the remote in a safe, dry location when not in use to prevent damage or accidental activation․
Avoiding Electrical Hazards
Prioritize safety by always switching off the power supply at the circuit breaker before handling the remote or fan․ Never use a damaged remote or wiring; replace them immediately․
Ensure hands are dry when operating the remote to prevent shock․
Avoid modifying the remote’s wiring or internal components, as this can create a dangerous situation․
If you notice any sparking, burning smells, or unusual behavior, disconnect power and consult an electrician․
Proper Remote Storage
To prolong the life of your Hampton Bay remote, store it in a cool, dry place away from direct sunlight and extreme temperatures․
Avoid storing the remote where it could be exposed to moisture or dust, which can damage the internal components․
Remove the batteries if the remote will not be used for an extended period to prevent corrosion and potential leakage․
Keep the remote out of reach of children and pets to prevent accidental damage or ingestion of batteries․