
Honeywell RTH2300B1038 Manual: Comprehensive Guide
This comprehensive guide details the Honeywell RTH2300B1038 thermostat, offering 36 pages of instructions,
installation guides, and troubleshooting tips in English, alongside user manuals and quick start references.
The Honeywell RTH2300B1038 is a widely utilized programmable thermostat designed for efficient home climate control. This manual serves as a complete resource for understanding, installing, operating, and maintaining this model. It caters to both homeowners and HVAC professionals seeking detailed guidance.
Available documentation includes a 36-page user manual, installation instructions, and quick reference guides, all in English. These resources cover everything from initial setup and temperature adjustments to advanced programming features like scheduling and fan control. The thermostat’s functionality extends to managing heating, cooling, and automatic system modes.
Users will find information on filter change reminders, backlight adjustments, and troubleshooting common issues. The manual also details error codes and provides instructions for resetting the thermostat, ensuring optimal performance and longevity. This guide aims to empower users to maximize the benefits of their Honeywell RTH2300B1038.
What’s Included in the Manual
This Honeywell RTH2300B1038 manual comprehensively details all aspects of the thermostat, spanning 36 pages of information. Users can expect a thorough exploration of installation procedures, complete with wiring diagrams and mounting instructions. Operational guidance covers setting temperatures, programming schedules, and utilizing the hold function for customized comfort.
Beyond basic operation, the manual delves into advanced features like fan control settings, system mode selection (heat, cool, auto), and the filter change reminder system. Detailed explanations of troubleshooting steps, including common issues, error code interpretations, and thermostat reset procedures, are also included.
Furthermore, the manual provides essential technical specifications, outlining power requirements, temperature range capabilities, and the thermostat’s physical dimensions and weight. Available in English, it serves as a complete reference for both installation and everyday use.
Safety Precautions
Prior to installing or operating the Honeywell RTH2300B1038 thermostat, carefully review all safety precautions outlined within the 36-page manual. Disconnect power to your HVAC system at the breaker box before commencing any wiring or installation procedures to prevent electrical shock. Improper wiring can lead to system malfunction or hazardous conditions.
Ensure the thermostat is installed by a qualified individual familiar with low-voltage wiring and HVAC systems. Do not attempt repairs beyond those described in the manual; unauthorized modifications can void the warranty and create safety risks. Keep the thermostat dry and avoid exposing it to extreme temperatures or direct sunlight.
This manual emphasizes the importance of following all local and national electrical codes during installation. Always read and save these instructions for future reference, ensuring safe and reliable operation of your Honeywell thermostat.

Installation Guide
Detailed installation instructions, wiring diagrams, and mounting guidance are provided within the 36-page manual, ensuring proper setup of the Honeywell RTH2300B1038 thermostat.
Tools Required for Installation
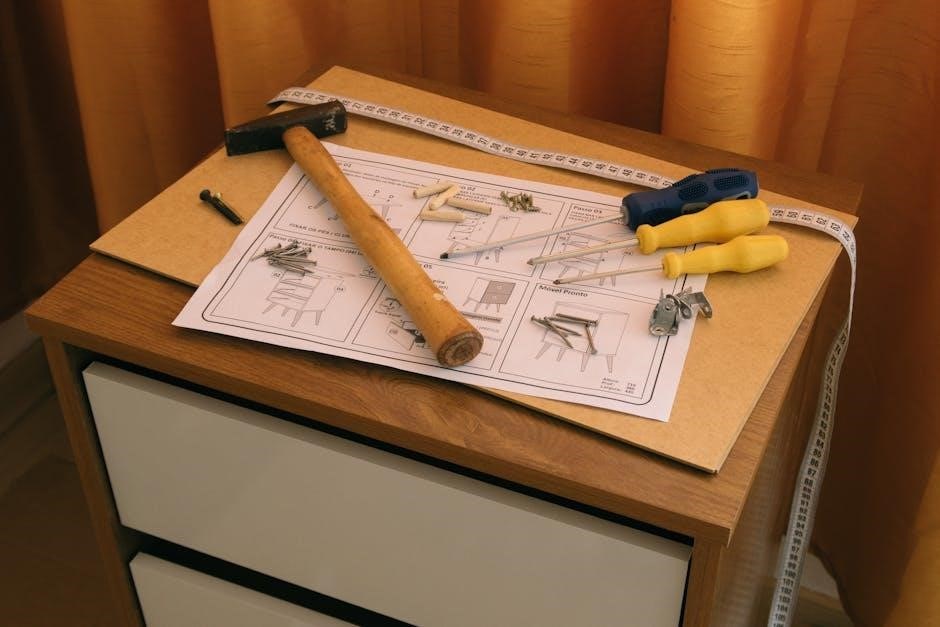
Before beginning the installation of your Honeywell RTH2300B1038 thermostat, gather the necessary tools to ensure a smooth and efficient process. A small, flathead screwdriver is essential for terminal block connections and adjustments. A Phillips head screwdriver will be needed for mounting the thermostat base to the wall.
You’ll also require wire strippers to carefully expose the correct length of wire for secure connections. A level is crucial for ensuring the thermostat is mounted straight, contributing to accurate temperature readings. A pencil is helpful for marking screw locations on the wall.
Additionally, consider having a voltage tester to verify power is off before working with wiring, prioritizing safety. Depending on your existing wiring, pliers may be useful for manipulating wires. Finally, refer to the 36-page installation manual for specific tool recommendations and safety guidelines.
Wiring Diagrams and Color Codes
Understanding the wiring is paramount for a successful Honeywell RTH2300B1038 installation. The manual provides detailed wiring diagrams illustrating connections for various HVAC system configurations – including conventional heating and cooling, heat pumps, and millivolt systems.
Common color codes are outlined to simplify the process: typically, Red represents 24V power, White is used for heating, Yellow for cooling, Green for the common wire, and Blue for the fan. However, always verify these codes with your specific system’s wiring.
The 36-page manual includes specific diagrams for different system types, ensuring correct terminal connections. Incorrect wiring can damage your HVAC equipment or the thermostat itself. Carefully follow the diagrams and, if unsure, consult a qualified HVAC technician. Proper wiring guarantees optimal performance and safety.
Mounting the Thermostat Base
Securely mounting the thermostat base is a crucial step in the installation process. The Honeywell RTH2300B1038 manual details a straightforward procedure, beginning with turning off power to your HVAC system at the breaker.
Remove your old thermostat, carefully labeling the wires before disconnecting them. Use the provided mounting screws and wall anchors to attach the new baseplate to the wall, ensuring it’s level for accurate temperature readings.
The manual emphasizes using a level to prevent skewed readings. Feed the wires through the base opening and connect them to the appropriate terminals, referencing the wiring diagrams. Double-check all connections before proceeding. A firmly mounted base ensures stable operation and prevents future disconnections.
Connecting to HVAC System
Carefully connecting the Honeywell RTH2300B1038 to your HVAC system requires precise wire identification. The manual provides detailed wiring diagrams and color codes, essential for correct operation. Match each wire label from your old thermostat to the corresponding terminal on the new baseplate – typically labeled R, C, W, Y, and G.
Ensure wires are securely inserted into the terminals; loose connections can cause malfunctions. The ‘C’ wire, or common wire, is often crucial for consistent power. If you lack a ‘C’ wire, the manual may offer adapter solutions.
Verify all connections against the diagram before restoring power. Incorrect wiring can damage your HVAC equipment. Once connected, the thermostat should power on, initiating the setup process as outlined in the operating instructions.

Operating Instructions
The RTH2300B1038 offers intuitive control via its display, allowing temperature adjustments, schedule programming, and utilizing the hold function for customized comfort settings.
Understanding the Display
The Honeywell RTH2300B1038’s display provides crucial information at a glance. Typically, the large central area showcases the current room temperature, while the setpoint temperature – your desired heating or cooling level – is prominently displayed nearby. Icons indicate the current system mode: Heat, Cool, Auto, or Off.
A flame icon signifies heating is active, a snowflake indicates cooling, and “AUTO” means the thermostat will automatically switch between heating and cooling to maintain the set temperature. Other icons may denote fan operation (Auto or On), and programming status.
The display also features buttons for temperature adjustment, mode selection, and accessing programming features. Pay attention to any error codes that might appear, as these indicate potential issues with the system. Refer to the troubleshooting section of this manual for detailed explanations of error codes and their solutions. A clear understanding of the display is fundamental to effectively operating your thermostat.
Setting the Temperature
Adjusting the temperature on your Honeywell RTH2300B1038 is straightforward. Utilize the “Up” and “Down” arrow buttons located on the thermostat face. Each press will typically adjust the setpoint temperature by one degree Fahrenheit (or Celsius, depending on your settings). The display will clearly show the new setpoint as you make adjustments.
Ensure the thermostat is in the desired mode – Heat or Cool – before setting the temperature. In “Auto” mode, the thermostat will select heating or cooling based on the difference between the setpoint and the room temperature.
Observe the current room temperature displayed alongside the setpoint to understand how quickly the system will respond. Remember that it takes time for the HVAC system to reach the desired temperature. For temporary adjustments, consider using the “Hold” function (described elsewhere in this manual) to override programmed schedules.
Programming Schedules
The Honeywell RTH2300B1038 allows for customized heating and cooling schedules to optimize comfort and energy savings. Access the programming mode by pressing the “Menu” or “Program” button (refer to the display guide for specific button labeling). You’ll typically navigate through days of the week and time periods.
For each period (Wake, Leave, Return, Sleep), set a desired temperature. The thermostat remembers these settings and automatically adjusts the temperature according to your schedule. You can often copy a schedule from one day to another to simplify programming.
Review your programmed schedule regularly to ensure it aligns with your lifestyle. Consider seasonal adjustments to maximize efficiency. Detailed instructions on navigating the programming menus are provided within the full user manual, available for download online.
Using the Hold Function

The “Hold” function on the Honeywell RTH2300B1038 overrides your programmed schedule, maintaining a set temperature indefinitely. This is useful for unexpected changes in routine or when a consistent temperature is desired for an extended period.
To activate “Hold,” typically press and hold a designated button – often labeled “Hold” or “Run” – until the display indicates “Hold” is active. The thermostat will then ignore the programmed schedule and maintain the currently set temperature.
To return to the programmed schedule, you’ll usually need to press the “Run” or “Schedule” button. Refer to the manual for the precise button sequence. Remember that using “Hold” continuously bypasses energy-saving schedules, potentially increasing utility costs.
Advanced Features
Explore enhanced control with fan settings, system mode selection (heat, cool, auto), a convenient filter change reminder, and adjustable backlight options for optimal visibility.
Fan Control Settings
The Honeywell RTH2300B1038 offers versatile fan control options to enhance your comfort and optimize energy usage. You can select from several modes to suit your preferences. The “Auto” setting runs the fan only during heating or cooling cycles, providing efficient operation and consistent temperature.
Alternatively, the “On” setting keeps the fan running continuously, even when the heating or cooling system isn’t actively working. This can help circulate air throughout your home, improving temperature distribution and potentially reducing humidity. Some models may also include a “Circulate” mode, which periodically runs the fan for a set duration to maintain air movement without constant operation.
Understanding these settings allows you to tailor the fan operation to your specific needs, maximizing comfort and minimizing energy consumption. Refer to the manual for detailed instructions on accessing and adjusting these fan control features.
System Mode Selection (Heat, Cool, Auto)
The Honeywell RTH2300B1038 thermostat provides three primary system modes: Heat, Cool, and Auto. Selecting the correct mode ensures your HVAC system operates as intended, delivering optimal comfort. In “Heat” mode, the thermostat activates the heating system when the room temperature falls below the setpoint, maintaining a warm environment.
Conversely, “Cool” mode activates the cooling system when the temperature rises above the setpoint, providing a refreshing coolness. The “Auto” mode intelligently switches between heating and cooling based on your programmed temperature settings, automatically adapting to changing weather conditions.
This mode is ideal for consistent comfort without manual adjustments. The manual details how to navigate the thermostat’s interface to easily switch between these modes, allowing you to customize your climate control experience throughout the year.
Filter Change Reminder
Maintaining a clean air filter is crucial for optimal HVAC system performance and air quality. The Honeywell RTH2300B1038 thermostat incorporates a helpful filter change reminder feature. This feature doesn’t automatically monitor filter cleanliness, but allows you to program a reminder based on your filter type and usage.
The manual guides you through setting a reminder period – typically every 1 to 3 months – after which a visual alert will appear on the thermostat’s display. This proactive reminder prevents reduced airflow, increased energy consumption, and potential system damage caused by a clogged filter.
Regular filter changes contribute to a healthier home environment and extend the lifespan of your HVAC equipment. The manual provides detailed instructions on how to activate, adjust, and reset this valuable filter change reminder function.
Backlight Adjustment
The Honeywell RTH2300B1038 thermostat features an adjustable backlight for enhanced visibility in low-light conditions. The user manual details how to customize the backlight settings to suit your preferences and viewing environment. You can typically adjust both the brightness level and the duration the backlight remains illuminated after button presses.

Options often include a continuous backlight mode, where the backlight is always on, or an automatic mode, where it activates briefly with each interaction. Adjusting the brightness allows you to balance visibility with energy conservation.
The manual provides step-by-step instructions on accessing the backlight settings within the thermostat’s menu. This customization ensures comfortable and convenient operation, even in dimly lit rooms, improving the overall user experience.

Troubleshooting
This section provides solutions for common issues, explains error codes, and guides users through resetting the Honeywell RTH2300B1038 thermostat for optimal performance.
Common Issues and Solutions
Display Not Lit: First, verify the thermostat has power. Check the circuit breaker and ensure proper wiring connections; If the display remains dark, the thermostat may require battery replacement, even if hardwired.
Incorrect Temperature Readings: Ensure the thermostat isn’t exposed to direct sunlight or drafts, which can skew readings. Calibrate the temperature if necessary, following the instructions in the ‘Operating Instructions’ section.
System Not Responding: Confirm the system mode (Heat, Cool, Auto) is correctly selected. Check the wiring connections to the HVAC system, ensuring they are secure and match the wiring diagram. A tripped breaker could also be the cause.
Inconsistent Heating/Cooling: Verify the programmed schedule is accurate and meets your needs. A dirty air filter can also cause inconsistent temperatures; remember to utilize the filter change reminder feature.
If issues persist, consult the full manual or contact a qualified HVAC technician.
Error Codes and Meanings
While the Honeywell RTH2300B1038 manual doesn’t extensively detail specific error codes, certain display behaviors indicate potential problems. A flashing display often signals a communication issue between the thermostat and the HVAC system.
A consistently blank display, despite verified power, suggests an internal fault requiring professional attention. Unusual characters or symbols appearing on the screen also indicate a malfunction.
If the thermostat cycles on and off rapidly, it could signify a wiring issue or a problem with the HVAC unit itself. Check the wiring connections and ensure compatibility.
For more complex issues, referencing the complete installation guide and owner’s manual is crucial. If the problem persists after troubleshooting, contacting Honeywell support or a qualified HVAC technician is recommended for accurate diagnosis and repair.
Remember to note the specific display behavior when seeking assistance.
Resetting the Thermostat
Resetting your Honeywell RTH2300B1038 thermostat can resolve minor operational glitches. A simple reset involves powering off the thermostat at the breaker box for approximately one minute. This clears the temporary memory and restarts the system.
For a more comprehensive reset, removing the thermostat from the wall plate and disconnecting the power for a longer duration – around five minutes – is recommended. This resets the programming to factory defaults.
Be aware that a factory reset will erase all personalized schedules and settings, requiring you to reprogram the thermostat afterward.
Before resetting, consult the owner’s manual for specific instructions and potential data backup options. If resetting doesn’t resolve the issue, or if the thermostat fails to power on after resetting, professional assistance may be necessary.
Always prioritize safety when working with electrical components.

Technical Specifications
The Honeywell RTH2300B1038 requires standard power, operates within a defined temperature range, and features specific dimensions and weight detailed in the manual.
Power Requirements
The Honeywell RTH2300B1038 thermostat is designed to operate utilizing a standard 24 VAC (Volt-Alternating Current) power source, commonly supplied by the heating, ventilation, and air conditioning (HVAC) system. It does not operate on standard household electrical power like 120 VAC.
Crucially, the thermostat itself does not require batteries for basic operation when connected to a 24 VAC system. However, some models or configurations might utilize batteries as a backup power source to maintain the programmed settings during power outages.
Refer to the detailed wiring diagrams within the user manual to correctly identify and connect the appropriate wires from your HVAC system to the thermostat terminals. Incorrect wiring can damage the thermostat or the HVAC system. Always disconnect power to the HVAC system before attempting any wiring changes.
Ensure the HVAC system’s transformer is functioning correctly and providing a stable 24 VAC output for optimal thermostat performance.
Temperature Range
The Honeywell RTH2300B1038 thermostat is engineered to accurately measure and control temperatures within a specified range, typically spanning from 40°F to 90°F (4.4°C to 32.2°C). However, the actual measurable range can be slightly broader, though performance may be less precise at the extreme ends.
It’s important to note that the thermostat’s display resolution might limit the precision of temperature readings. While the thermostat can sense temperature variations, it may display temperatures in whole-degree increments.
External factors, such as thermostat placement and airflow, can influence temperature readings. Avoid locating the thermostat in direct sunlight, near heat sources, or in areas with poor air circulation.
For optimal accuracy, calibrate the thermostat according to the instructions in the manual, if necessary. Regularly check the temperature against a known accurate thermometer to ensure reliable performance.
Dimensions and Weight
The Honeywell RTH2300B1038 thermostat boasts a compact design, making it suitable for various wall configurations. Its dimensions are approximately 4.7 inches in width, 3.1 inches in height, and 1.2 inches in depth. These measurements ensure it won’t dominate the wall space, blending seamlessly into most interiors.
Regarding weight, the thermostat is remarkably lightweight, tipping the scales at around 6 ounces (approximately 170 grams) without batteries. This minimal weight simplifies the installation process, reducing strain on wall anchors and mounting hardware.
These physical specifications are crucial for planning installation, particularly when replacing an existing thermostat. Ensure sufficient clearance around the mounting location for proper wiring and access.
The lightweight construction and modest size contribute to the thermostat’s overall user-friendliness and aesthetic appeal, making it a practical and unobtrusive addition to any home or office.